Draw Circle From Middle Krita

In this tutorial video I'm going to show you lot how to draw this digital painting of an angry orange from start to finish. In this tutorial I'll be using Krita version 4.2. The alpha version of 4.2 was merely released a few hours ago when I record the video. So I guess this will be a perfect chance for us also to examination drive this new release.
Here are the links to all of the 3 parts of this tutorial series.
- Role one which is this article you encounter now where nosotros encompass:
- Base of operations coloring
- Shading the torso
- Creating the eyes
- Creating the eyebrows
- Office 2 where we cover:
- Creating the mouth
- Merging layers
- Shading the eyes surface area
- Mouth casted shadows
- Eyes casted shadow
- Part 3 where nosotros encompass:
- Twig color
- Foliage shading
- Leaf casted shadow
- Adding textures
- Adding backlights
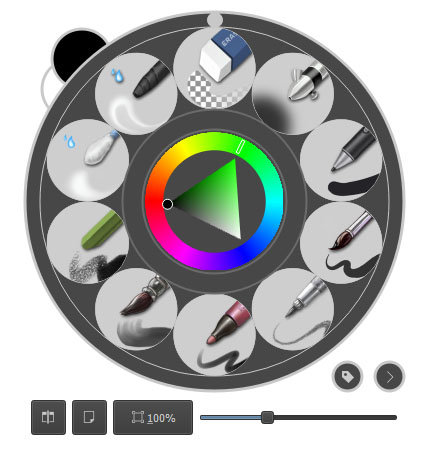
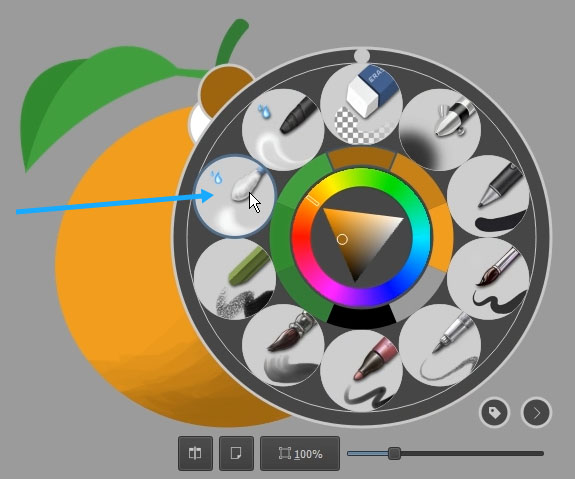
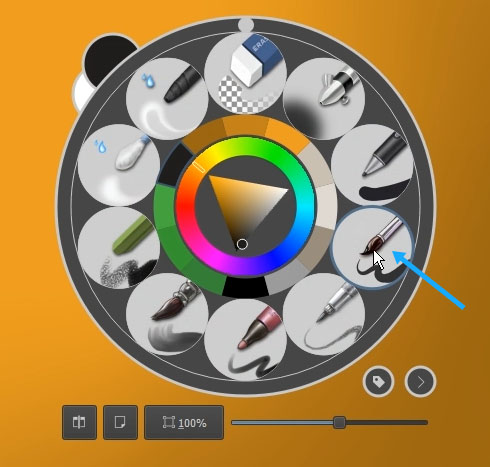
For this illustration I'll be using these brushes in here. You can detect all of these brushes in Krita past default. I'm not using any custom fabricated brushes in this tutorial. If yous want to follow along just pause the video now and put these brushes to your pop-upwards palette.
Earlier we continue, I want to explicate in accelerate that this tutorial is not intended for a consummate beginners who have never used Krita before. You should already know the basic stuffs like how to navigate the sheet, how to work with brushes, layers and most importantly how to utilize the vector features in Krita to create shapes and selections. And finally you need a drawing tablet. It will exist very very hard to paint annihilation using but just a mouse. Okay.
Base coloring
Okay let'due south begin with the groundwork. We really don't want to start any digital painting with a pure white background like this. Because this can influence our encephalon to cull colors brighter than it should. And so unlock the groundwork layer.

Notice a bright grayness color. And so press Shift + Backspace to fill up the background layer with the grayness color.

Lock the layer and actuate the "layer one" again. And then nosotros're working on a layer which is actually a transparent layer. First allow'southward depict the orange body. For this we can use the "ellipse" tool. Make sure the "fill" option is set to "foreground" color and the "outline" option is fix to "no outline".

Side by side permit's find a overnice orangish-color for the head or the torso base color. And then merely click elevate like this. I don't want to make the orange a perfect circle. I actually want it to be a bit squashed horizontally.

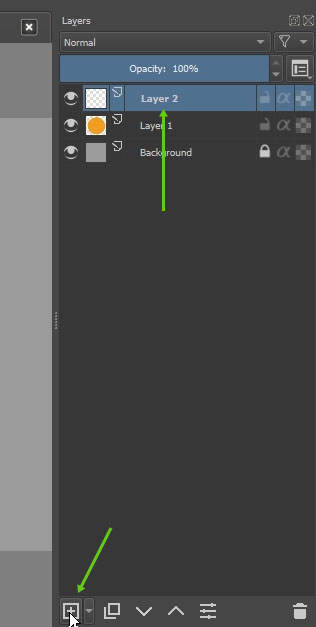
For the peak twig, let'southward create a new layer. Zoom in a scrap. We're going to create the twig a fleck bigger and later we tin can resize it to fit the orangish head.
Let's use the "bezier bend tool". And merely like the "ellipse" tool earlier, set the "fill" option to "foreground" colour. And the "outline" option to "no outline". Pick a dark-green color.

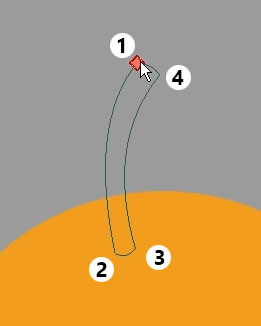
Click release in hither (ane). Click and drag in hither similar this (2). And then concur the Alt key. Release the mouse or the pen. Click in hither (3). Just like before click drag (4). Then concord Alt and drag like this until this point. Release the pen and then click on the initial vector signal.
Now the height area may need some more refining. There are many ways to practice this in Krita. We can use the brush tool, or utilize the option tool, or nosotros can only utilize the same method like earlier which is using the bezier curve tool.
To resize the twig nosotros can press Ctrl+T which is a shortcut for the "free transform" tool. Nosotros can scale it down, rotate information technology and movement information technology so it sits more or less at this location. Then motion this twig layer so it is below the trunk layer.

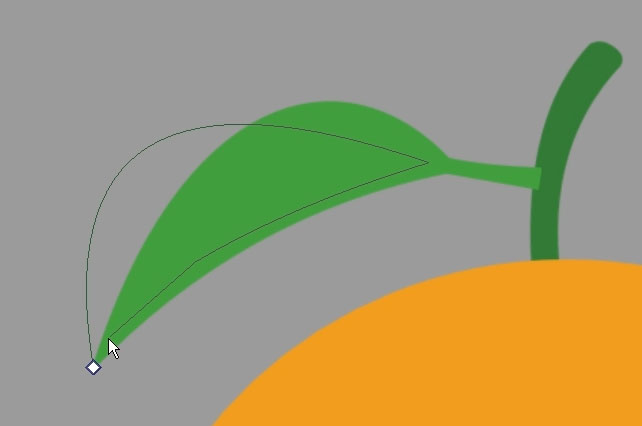
Next let's create the foliage. For the leaf nosotros demand to create a new layer. We're going to use the same "bezier curve" tool now, but with a slightly different color. Make it more towards yellow, a bit brighter and more than saturated. Click release in hither (one), click in hither (ii). And at this betoken we need to click drag similar this (3), then hold Alt and turn the handle to the other direction. And merely continue the procedure (4-5). Now, we accept created one half of the leaf.

To create the other half, create a new layer again. Put the new layer under the existing leafage layer. Now, besides dragging the layer like before, nosotros can too click this this down button to move a layer down.

Adjacent, option a darker color than the previous leafage color. And merely create this shape. Okay guys from this point forward I won't be explaining how to exercise vector editing over again to save fourth dimension. I will assume you lot already know how to do this.
Side by side, I think I want to make the leaf bigger. So I demand to select both of these layers. Then to merge layers in Krita you can use Ctrl+E shortcut.

Then press Ctrl+T or y'all tin also click directly on the "free transform" tool. Make it bigger and rotate it a scrap every bit y'all see fit. This is merely a personal preferences and then at that place is no correct or wrong about this. Okay. Allow'due south zoom in and prepare the finish of the leaf. Nosotros can pick the previous leaf color from the colour history and utilise the "bezier curve" tool once more.

Shading the trunk
Next allow's add shading on the chief trunk or the head. For this we need to turn on the "alpha lock" option in hither. If the "alpha lock" option is on. We tin can draw anything in this layer and the event volition always be inside the existing pixels. Nosotros won't be able to create new pixel areas, which is bully for sure scenarios such as when calculation shade colors. Okay.

Now for shading the body we're going to use a very simple technique. Start let's choice this glazing brush. Then to sample the existing torso colour.

We can hold Ctrl and then click on this existing pixel expanse, or we can just choice it from the "color history strip". Earlier doing any shading, you must always consider on which direction the lite volition be coming from? In this illustration nosotros only want to have a unmarried light source at the left top area. So this fashion, in general, the shadows will announced at the correct bottom surface area. And considering our object is basically a sphere, when adding shadow color you need to create a round motion like this.

Okay. So allow's choice a darker color now. For this you can select it manually. Or you can also use the "G" keyboard shortcut in Krita. As y'all can see Krita will pick a darker version of the previous active colour. Brand the brush a bit bigger. And merely add brush strokes similar this. Employ unlike pen pressures to control the brush opacity. Don't worry, information technology doesn't take to look perfect now. Next press Thousand once more to get even darker colour. And apply more castor strokes. Essentially we want to make the right lesser area the darkest role of all.

Okay, now to smooth out these brush strokes we demand to use the mistiness castor which is this brush in here.
Make the brush size bigger. And just elevate information technology a couple of times on the rough shading event. We tin see how this brush helps a lot to smooth out the pixel so nosotros get this nice gradation of colors. Okay.

Creating the optics
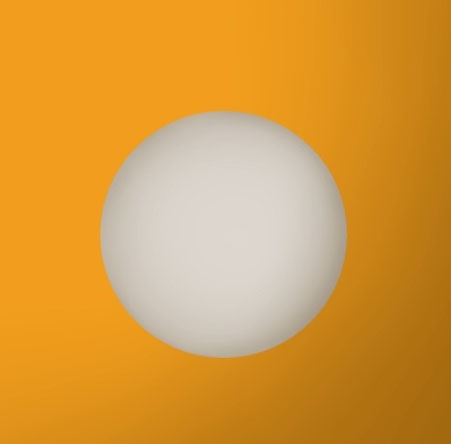
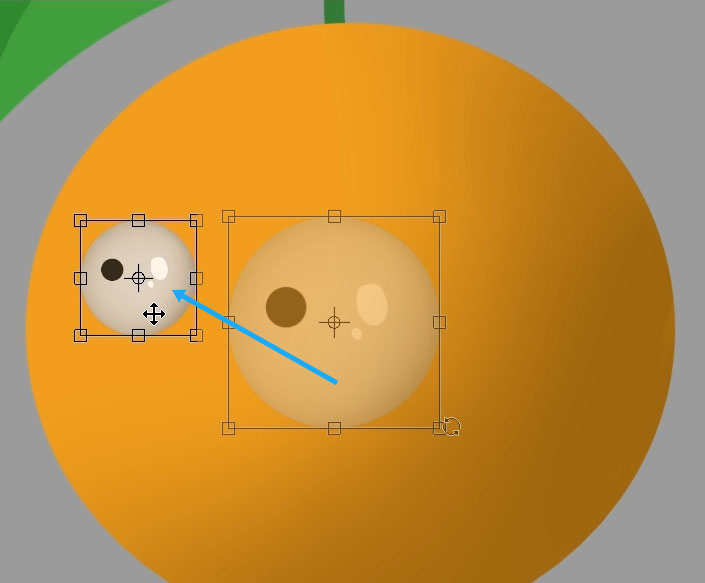
Side by side, allow'south create the eyeballs. For this nosotros need to create a new layer again. For the center color it is important to option an off white color. I'll explain later why need to exercise this. And also make is slightly towards orange to simulate a bit of color bleeding. Use the ellipse tool and click drag like this. While dragging, we need to hold the Shift fundamental to make the shape a perfect circumvolve.

Turn the "alpha lock" on. Pick darker color past pressing Chiliad. And allow'due south apply the airbrush castor preset now and use the darker color around the border region. Let's pick still a darker color, this time I'll do it manually. And and so add more than darkening on the edges.

Over again, information technology doesn't accept to be perfect because we're going to employ the blur brush again to smooth them out.
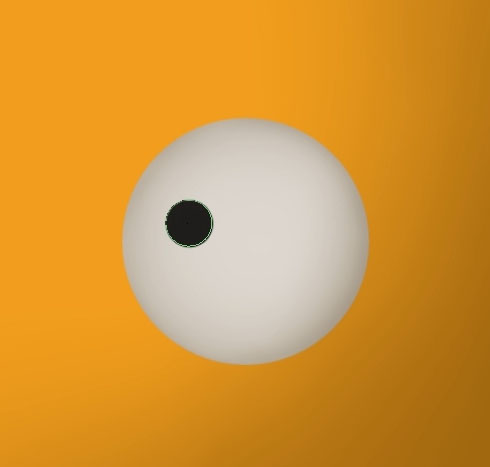
Next permit'due south add together a black pupil. Pick an almost black color slightly towards brown. And, if before we keep using the "ellipse" tool, I'm going to utilise a different method now and that is using this basic circular brush in here. Again this is just i of the default brushes available in Krita.
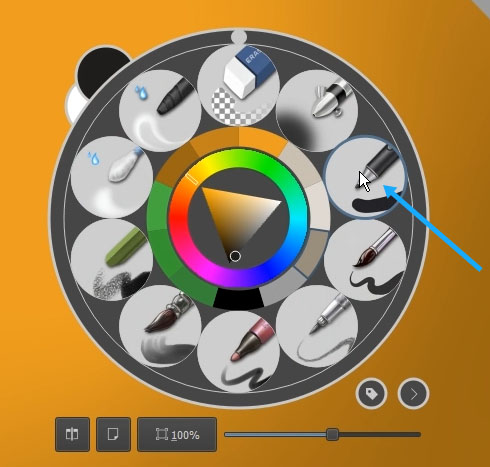
But click in hither. And we have a student.
Next we need to create speculars to make the eyeball looks sleeky. For this I'm going to use another castor which is this i.
And so choice a pure white color. So now y'all sympathise, why we shouldn't use pure white color before for the eye base of operations colour. This is because we are preserving the white color for things similar specular colors similar this. Okay.

Now our orange looks like Mike Wazowski. We demand to scale this layer and move it to the correct location. For this nosotros utilize the "free transform" tool.
For the right eye, well our right side that is, press Ctrl+J to duplicate the layer. Now in Krita, If you merely want to movement a layer without scaling or rotating it we tin can only use the "motility" tool which is T for shortcut.

Creating the eyebrows
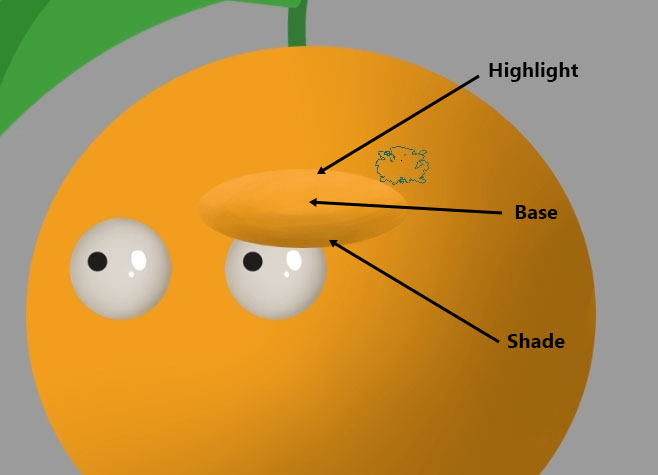
Next, we desire to create the eyebrows. For the eyebrows we're going to create them using similar techniques that nosotros did for the main body. Information technology is just a small version of it. Okay. So create a new layer. Utilise the "ellipse" tool. And pick the base of operations orangish color. Create an ellipse similar this.

Then we can add shading to this elliptical shape just similar before. Turn on the "alpha lock" option. Use this castor again and pick a darker orangish color. Add the outset phase of brush strokes. Then pick even darker color. And stroke once again. At present what makes this countenance different from the torso is that we are adding highlight colors on it. We can pick brighter color manually or utilise the shortcut "50" in Krita. Then just use the highlight color on the top area of the eyebrow.
So but like earlier use the "blur brush" to smoothen out the colors. Okay.

The rest is obvious, I approximate. We tin employ the "gratuitous transform" tool to suit the eyebrow. Our goal is to make it looks aroused. Press Enter.

Ctrl+J to indistinguishable the layer. Move it downwardly. Press Ctrl+T again. Now to flip this layer, we can simply go to the "tool option" docker in hither and click this "flip horizontal button" down here.

Move it and adjust information technology every bit you see fit. Now we demand to select both of the eyebrows layers. Press T and move them so the center of these layer is slightly towards the left direction. To give the eyebrows a sense of depth. Okay. Now for the 2d eyebrow, of class nosotros're not going to have this large tumor on its head.

To cutting this excessive eyebrow nosotros can use the "bezier curve selection" tool. This tool works similar the "bezier curve" tool but information technology volition only create selections, not shapes. Merely create a selection like this. And then press Delete.

Okay guys. I will wrap upwardly this article as the kickoff part of the tutorial. I'll come across you guys in the 2d function article, in sha Allah. Wassalamualaikum.
mitchellposeveropme.blogspot.com
Source: https://kritatutorials.com/how-to-draw-an-angry-orange-in-krita-4-2-part-1/
Belum ada Komentar untuk "Draw Circle From Middle Krita"
Posting Komentar